Adding thin stone veneer for interior walls is a powerful way to bring texture, elegance, and natural charm into any room. Whether you’re updating a fireplace, designing an accent wall, or adding rustic appeal to a hallway, thin stone veneer delivers the timeless look of natural stone with a fraction of the weight. However, successful installation requires precision, planning, and the right techniques. This guide covers every step—from preparation to finishing touches—so you can install thin stone veneer with confidence and style.
Benefits of Using Thin Stone Veneer for Interior Walls
Before diving into installation, it’s important to understand why thin stone veneer for interior walls is such a popular choice among designers, builders, and homeowners.
Lightweight and Easy to Handle
Unlike full-thickness stone, thin veneer is only about 1 inch thick, making it significantly lighter and easier to work with. This allows it to be installed on most interior wall types without additional structural support, offering flexibility in where it can be applied.
Authentic Look of Natural Stone
Because thin stone veneer is cut from real stone, it retains the texture, color variation, and durability that synthetic alternatives often fail to replicate. It adds depth and character to interiors, from rustic farmhouse styles to sleek modern aesthetics.
Preparing the Wall Surface for Stone Veneer Application
A successful installation of thin stone veneer for interior walls begins with proper surface preparation. This step ensures long-lasting adhesion and prevents costly repairs down the line.
Choosing the Right Substrate
Most interior surfaces—drywall or cement board—can support thin stone veneer with proper prep. For drywall, you’ll need to install a metal lath and scratch coat to provide a secure surface for the mortar to bond. Cement board, however, often allows for direct application of mortar.
Cleaning and Leveling the Surface
Remove dust, grease, or debris from the surface to ensure optimal adhesion. If you’re working with painted drywall, lightly scuff the surface to promote better mortar grip. Any imperfections or uneven areas should be leveled to avoid misaligned stones or bulging sections once the veneer is applied.
Gathering Tools and Materials for a Smooth Installation
Having the right tools on hand is essential for an efficient and clean installation of thin stone veneer for interior walls.
Tools You’ll Need
Common tools include a notched trowel, margin trowel, wet saw with a diamond blade, level, chalk line, mixing bucket, and a masonry brush. For grouting and cleanup, you’ll also need a grout bag, sponge, and sealant applicator.
Choosing the Correct Mortar and Adhesive
For indoor applications, use a polymer-modified thin-set mortar or mortar specifically designed for stone veneer. Avoid using tile adhesive or construction glue, as these will not offer the necessary strength or durability for stone applications.
Installing the Stone: Step-by-Step Application
Now that your wall is prepped and tools are ready, it’s time to install the thin stone veneer for interior walls using proper methods to ensure visual balance and structural integrity.
Layout Planning and Dry Fitting
Before applying any mortar, lay out your stone pieces on the floor near the wall to visualize the final look. Mix pieces from multiple boxes to blend natural color variations and avoid noticeable pattern repetition. Dry fitting also helps identify where cuts will be needed.
Applying Mortar and Setting Stones
Use your notched trowel to apply mortar to the wall and back-butter each stone to ensure full coverage. Press each stone firmly into place, wiggling slightly to create suction and remove air pockets. Begin at the bottom of the wall and work your way up, using spacers if desired to maintain consistent gaps.
Grouting, Sealing, and Final Touches
Proper finishing is crucial to achieving a professional appearance and protecting your thin stone veneer for interior walls from dust and moisture.
Grouting and Cleaning the Joints
Once the mortar has set (usually after 24 hours), fill the joints with grout using a grout bag. Smooth the joints with a pointing tool or gloved finger for a clean, uniform finish. After the grout begins to dry, use a sponge and soft brush to remove any haze or excess from the stone face.
Sealing the Stone for Longevity
Seal the finished wall with a breathable, non-glossy sealer to preserve the stone’s natural appearance. This adds a protective layer against household grime, fingerprints, and moisture—especially in high-traffic areas or near kitchens and fireplaces.
Common Mistakes to Avoid During Installation
Even minor missteps can affect the appearance or performance of your stone veneer. Avoid these common errors to ensure a successful installation.
Skipping Surface Prep
Failing to prep your substrate properly is one of the biggest mistakes. Without a rough, clean surface or scratch coat, the mortar may fail to bond, leading to loose or falling stones over time.
Not Mixing Stones for Color Variation
Stone is a natural material with color and texture variation. To avoid large clusters of similar tones, always pull from multiple boxes and shuffle pieces before installation to maintain a natural, balanced look.
Ideal Interior Spaces for Stone Veneer Applications
Thin stone veneer for interior walls can dramatically elevate a variety of spaces throughout the home or business.
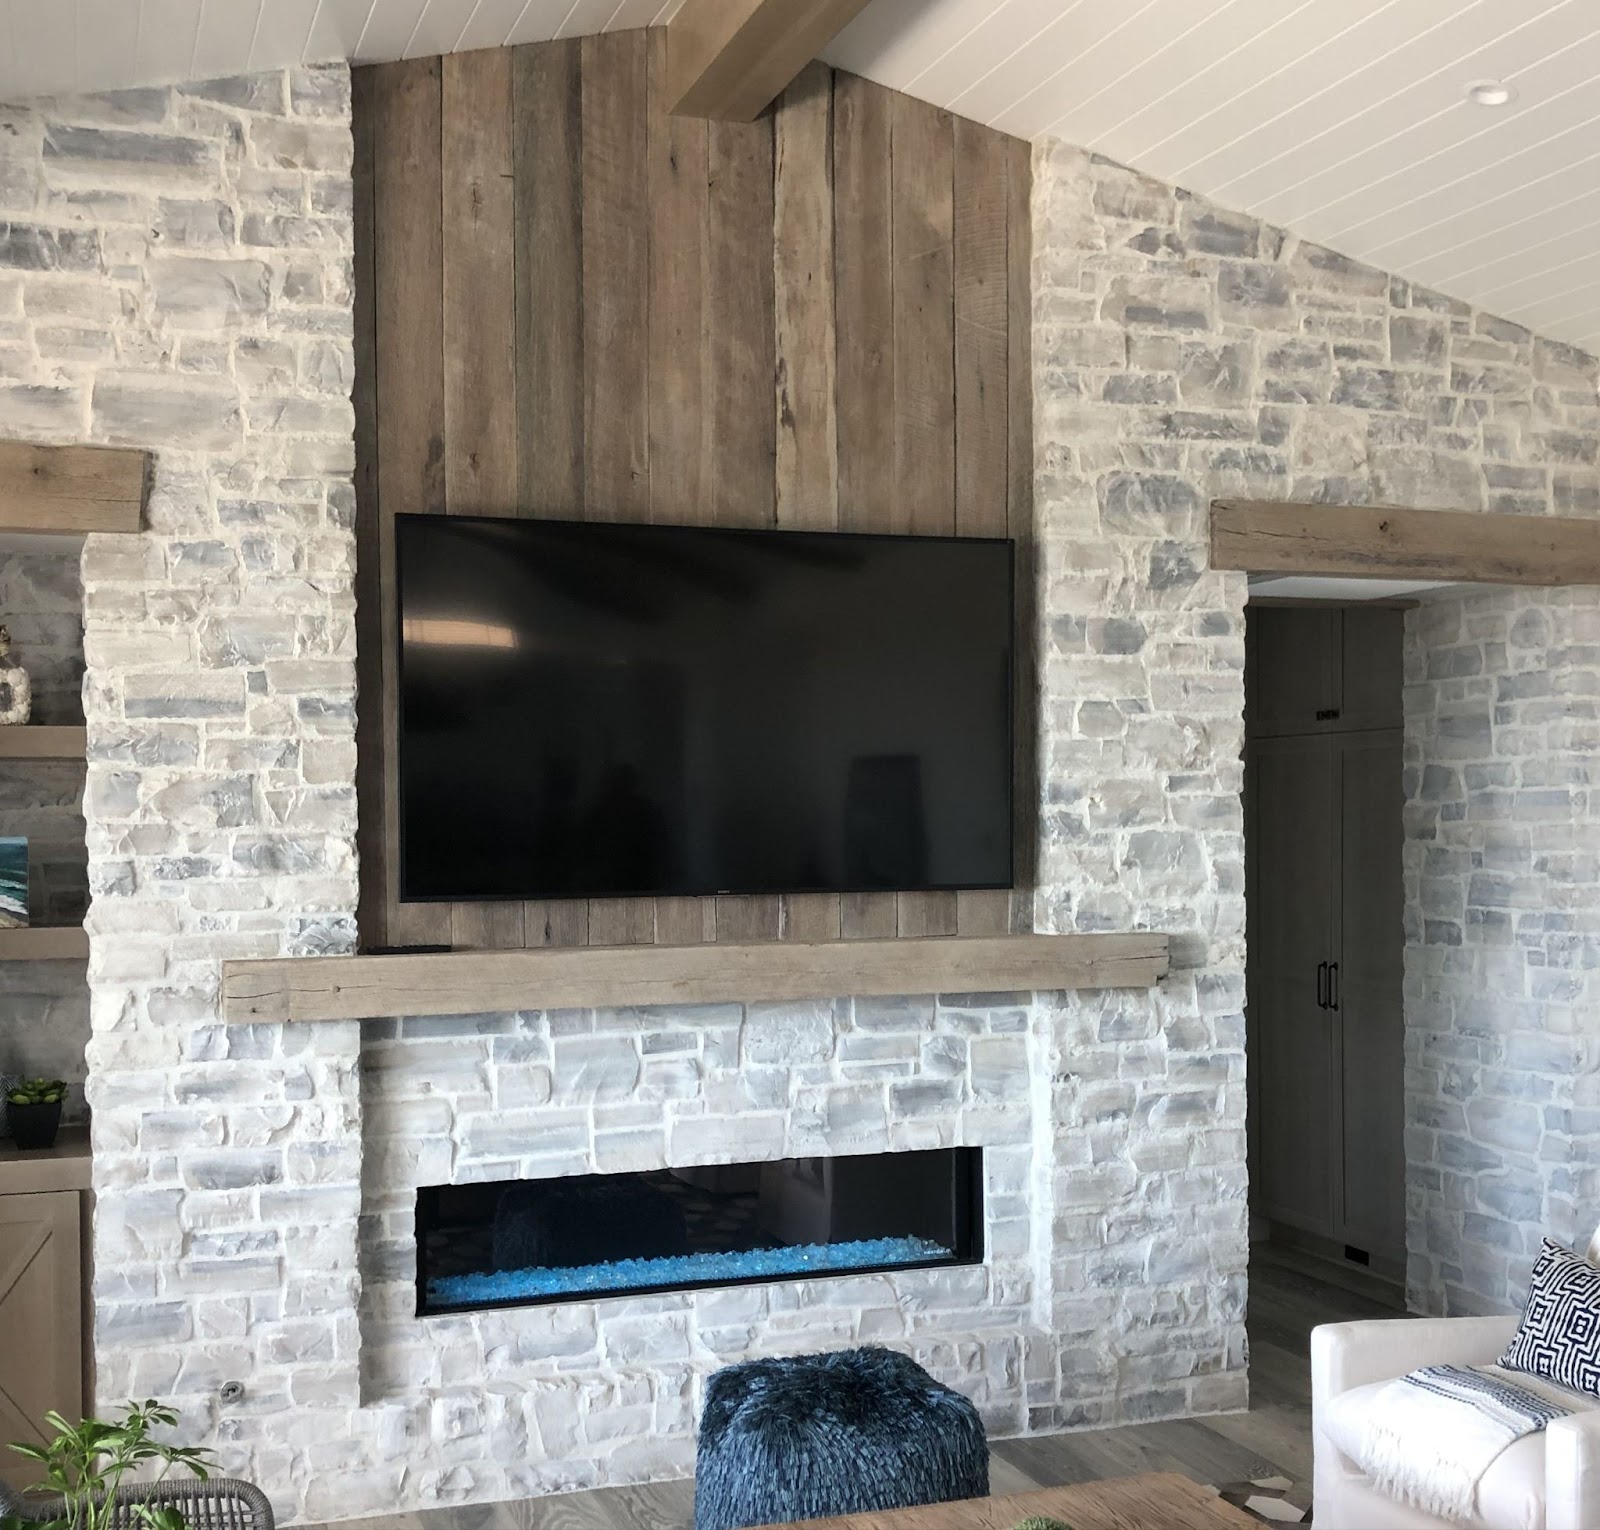
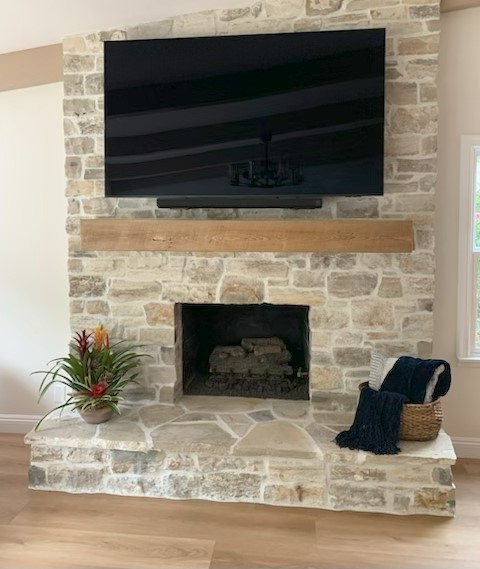
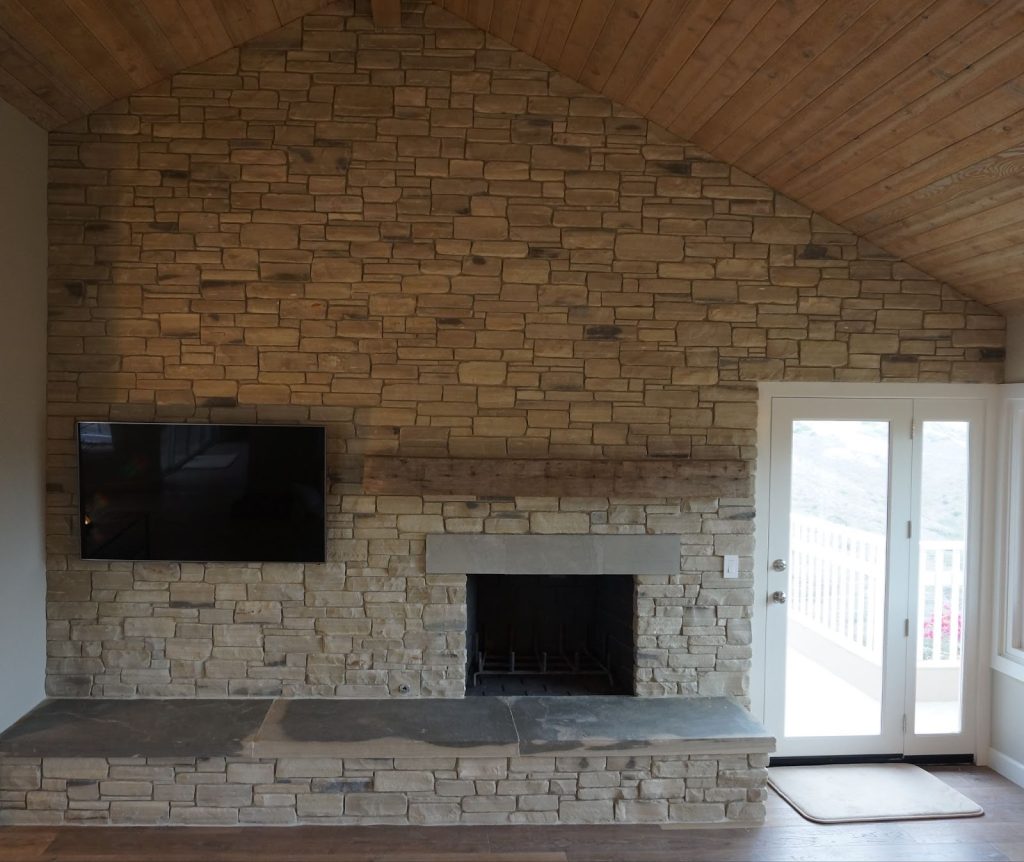
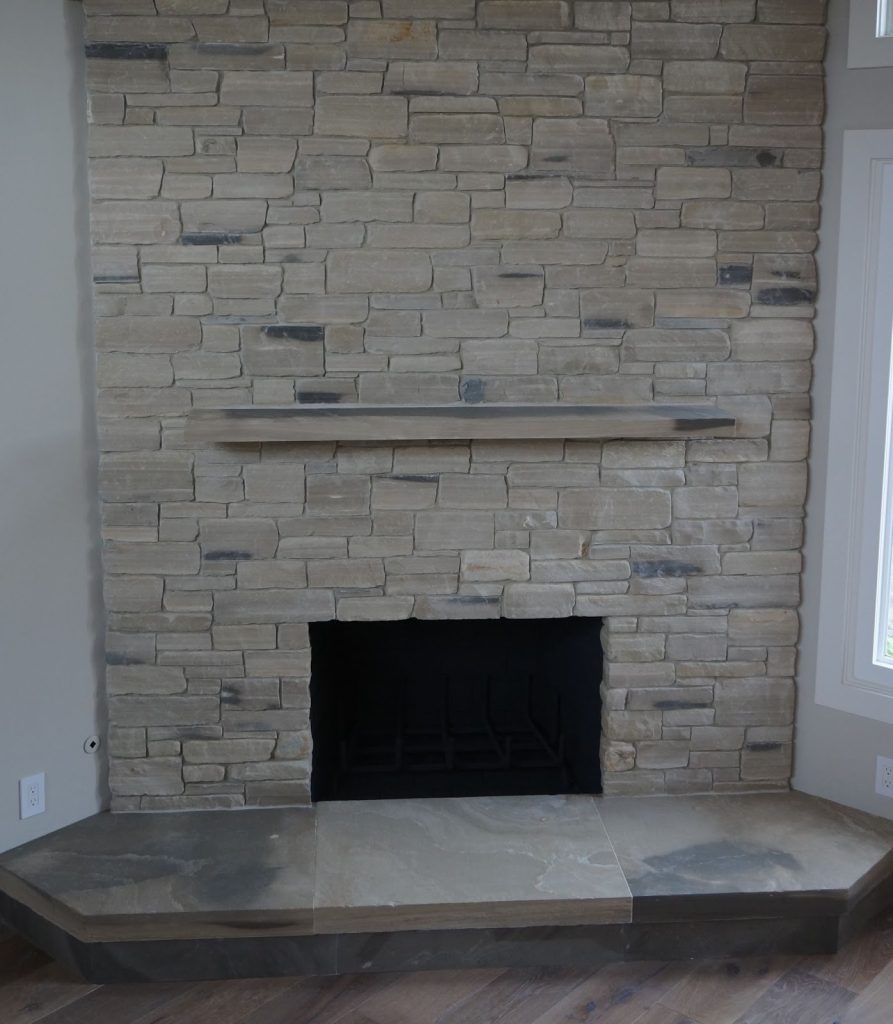
Living Rooms and Fireplaces
Add texture and warmth to your living space with a stone veneer fireplace surround or feature wall. Natural stone adds depth and character that enhances both rustic and modern décor themes.
Hallways, Entryways, and Stairwells
These often-overlooked spaces become architectural highlights when clad in thin stone veneer. A well-lit hallway with a textured stone wall creates a sense of luxury and intrigue, making first impressions count.
How to Maintain Thin Stone Veneer Indoors
Proper care keeps your thin stone veneer for interior walls looking pristine for years without extensive effort.
Regular Cleaning and Dusting
Use a soft brush or microfiber cloth to remove dust. Avoid abrasive cleaners, as they may scratch or dull the surface. For stubborn spots, a mild soap solution and damp cloth will suffice.
Inspecting and Touching Up Grout
Periodically check grout lines for cracking or separation. Small touch-ups can prevent larger problems and keep your installation secure and beautiful long term.
Frequently Asked Questions (FAQ)
1. Can I install thin stone veneer over drywall?
Yes, but you must first install a metal lath and apply a scratch coat to ensure proper mortar adhesion.
2. Is thin stone veneer safe for fireplaces?
Absolutely. Thin stone veneer is non-combustible and ideal for fireplace surrounds when installed with the proper mortar.
3. How long does it take to install thin stone veneer on a wall?
Most interior projects can be completed in 1–3 days depending on the size and complexity of the wall.
4. Do I need to seal thin stone veneer indoors?
Sealing is optional but recommended, especially in high-traffic areas or where moisture is present, such as near kitchens.
5. Can I DIY thin stone veneer installation?
Yes, it’s possible with the right tools and preparation. However, for best results, professional installation is recommended—especially for complex patterns or large areas.
Conclusion
Installing thin stone veneer for interior walls is an artful way to bring nature indoors. With its blend of versatility, durability, and aesthetic appeal, it’s ideal for feature walls, fireplaces, and accent surfaces. But to achieve a result that truly enhances your space, it’s important to use high-quality stone and follow professional installation practices.
At Lompoc Stone, we offer a wide selection of natural thin stone veneer options, crafted with precision and care to meet the highest design standards. From contemporary cuts to rustic finishes, our expert team helps you find the perfect stone for your interior vision—and provides the guidance needed to install it with confidence.
Contact Lompoc Stone today to explore our premium natural stone veneer collection and take your interiors to the next level.